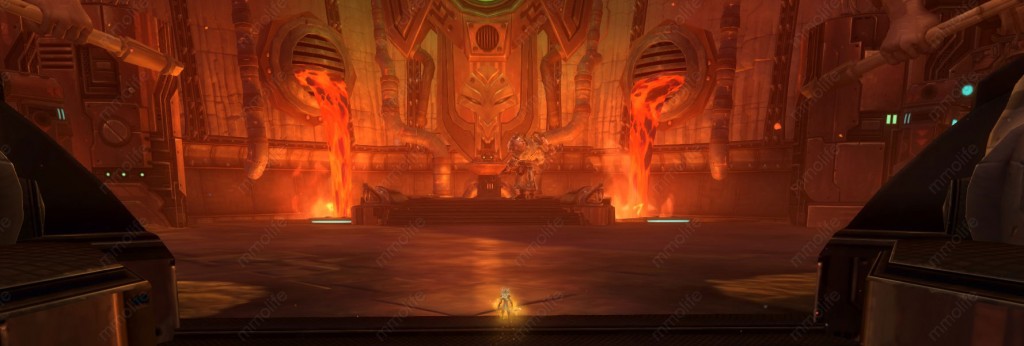
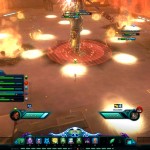
The Ruins of Kel Voreth is a level 20 dungeon, located in the southeast corner of Auroria. You must be at least level 17 to enter, but the dungeon appears in group finder at level 20.
- Bosses: Grond the Corpsemaker, Slavemaster Drokk, Forgemaster Trogun
- Optional objective boss: Darkwitch Gurka (doesn’t spawn every run)
- Notable trash mobs: Voreth Darkwitch
- Bronze medal: All optional objectives must be completed.
- Silver Medal: 40 minute timer + all optional objectives
- Gold medal: 40 minute timer + all optional objectives + all challenges + no deaths
Grond the Corpsemaker Boss
Grond appears once you clear three packs of mobs in Blood Pit. He is surrounded by traps which stun you once you get caught in one, so you have to use breakout (quick tap) mechanic to get out of it. It’s destroyed once you get out, but respawns quickly. Interrupts are needed. He has interrupt armor of 2.
ABILITIES:
1. Cone frontal and rear attack – His most used ability next to standard auto- attack. Tank has to eat it but everyone else should stand on his left side. This positioning helps with Trash ability as well.
2. Trash – Grond starts bucking and spinning counter-clockwise, dealing around 3k damage and knocks back players caught in it (it might knock you into a trap and stun you, dangerous if it happens to a healer). Everyone but tank should be on his left side, interrupting him when he starts casting Trash. You need 3 interrupts since Grond has interrupt armor of 2. This ability happens roughly every 30 seconds.
3. Charge – Charges random player or ~3k and gets back to a tank. Looks like it targets the furthest player (not confirmed).
4. Bellow – Around 50% of his HP, Grond casts big aoe circle around him that does around 4-4.5k and subdues (that’s silence and disarm together in Wildstar) players caught in it. Use double tap to move quickly out of it, or just pick up your weapon on the ground – it is glowing blue. After AoE he spawns three adds. Deal with them and continue pounding the boss.
5. Mutilate – Under 30% he gains another cone attack, doing multiple hits while casting it. This ability does a lot of damage on a tank and pretty much kills everyone else if they are caught in it. Tanks may try do dodge this if they are quick enough, healers should try to keep tank topped when boss is under 30%.
- Cone telegraph in front of the boss.
- Trash telegraph.
- Bellow telegraph.
- Adds spawning after Bellow. You can see blue-glowing weapons on the ground, after some players got caught in Bellow.
- Mutilate telegraph.
Darkwitch Gurka – Optional Boss
She has interrupt armor of 2, fairly easy fight, compared to other bosses. Tanking her in the middle while players are spread around the platform creates more space to dodge telegraphs.
ABILITIES:
1. Deadly Defilement – Spawns circular telegraphs on all players on their last location. Usually there are four of them. Just kite around until it stops. Often comes right after Afflicted soil. It can be interrupted.
2. Afflicted Soil – Spawns several columns of connected circular telegraphs. It often comes before Deadly Defilement, limiting the space for kiting and dodging. It can’t be interrupted.
3. Blinding Dark – Medium circular telegraph around her, blinding players caught in it. It can’t be interrupted.
Slavemaster Drokk
Combat with this boss is divided into 5 phases. There is nothing to interrupt.
Phase 1
Several artillery shots targeting random player, they are easy to dodge.
Phase 2
After 5-10 seconds he will disappear and Bombshell Constructs will start pouring through the entrance behind the Drokk’s starting position. After each of them takes its position they will start detonating sequence and blow up after ~10 seconds, covering the whole combat area. There are two ways to deal with this. The first one is to run toward the entrance and kill the last probe that comes out. The second is to pick and follow one of the first probes and dps it down while following to its designated location.
Phase 3
Drokk reappears at his starting position and fires several artillery shots at random players again. Around 10 seconds after that every player gets ported and “chained” to a pylon, taking periodical damage. You have limited movement and everyone is spread around the platform. Destroying the pylon frees you (CC breakers worked in beta, too). DPS with long telegraphs can DPS both their and nearby player’s pylon. Usually, dps has to free a healer after they free themselves. Stack around him for heals. While you are dealing with pylons, the boss casts artillery shots and expanding, wave-like circle telegraphs. Its max range is just around pylons, so you should move away from them as soon as possible to dodge the first circle while paying attention to artillery shots. The rest of the wave-like circles you can dodge by waiting for them to complete right in front of you and just roll forward toward the boss as the next circle begins under your feet. When Drokk disappears, the phase 4 starts.
Phase 4
Bigger drones appear at the green portal and approximately every 15 seconds one of the players gets a debuff (also, an icon appears above player’s head) causing drones to shoot and follow the targeted player and explode when they are close to him. Melee should watch for the debuff all the time and kite them ASAP when they get it (tank included), or simply stay away if they are not sure and let ranged DPS take care of them. At the moment, this mechanic is bugged and drones just stop as soon as they appear, and no kiting is needed. They still explode if anyone with the debuff comes near them. After ~1 minute, remaining drones will auto-destruct, showed by red, circular telegraph beneath them and the boss reappears, starting phase 5.
Phase 5
Very soon after reappearing, artillery shots start again, Drokk casts wave-like circles again and 3 Bombshell Constructs will come to his position and detonate. He starts casting circles as soon as Constructs stop near him and begin to detonate. Running away from them and dodging wave-like circle can be quite tricky sometimes. Tank should get boss in corners and move away from Bombshell Constructs as soon as they begin to detonate, outrunning wave-like circles. Ranged DPS and a healer can stand farther away between two corners (they have to spread a bit), to minimize movement. This mechanic repeats until the boss dies.
- Phase 1: Simple enough, just dodge circular telegraphs.
- Phase 2: Kill it before it kills you.
- Phase 3: Surfing is not an option on those waves.
- Phase 4: if you are hunted, just stay away.
- Phase 5: Once again, caught in red means dead.
Voreth Darkwitch – Trash Mob
She is pretty hard for first timers who have no idea about her abilities. She has 3 main abilities and there is no real order in which she uses them. Usually, one good interrupt chain is enough to survive this. She has interrupt armor of 2, so prepare at least 3 interrupts. It REALLY, REALLY helps if anyone beside a healer puts any cleanse on their action bar.
ABILITIES:
1. She targets one player and channels a purple lightning at him. Numerous circular telegraphs follow after that. You can interrupt this, but it’s much wiser to do that for her next ability.
2. She starts casting Rupture – cone telegraphs in front of her while turning around, dealing massive damage while knocking back everyone caught in it. This should be interrupted.
3. She slams the ground with her staff and puts a DoT on every player; there is no casting bar. It lasts for 16 seconds, ticks every 2 seconds, and every subsequent tick is slightly stronger. Mentioned before, but again, it should be dispelled as soon as possible, and everyone beside a healer should put it on his casting bar and use it.
- Cleansing this debuff really saves you a lot of trouble.
- Heal the targeted player and avoid telegraphs.
- Interrupting this saves you fromtaking massive, unnecessary damage.
Forgemaster Trogun
Fight in 2 phases. Interrupts are not essential, but they can make this fight a bit easier. He has interrupt armor of 2, get at least 3 interrupts.
Phase 1
On pull he runs to his forge and starts casting Exanite Weapon, causing huge telegraphs to cover the entire forge platform, surrounding him. Smaller circular telegraphs appear randomly on the ground downstairs. This phase lasts for 20 seconds. Standing in the middle of the room is a good spot to wait for him; you have to dodge only small telegraphs. After this cast he comes down and starts using two abilities, Volcanic Strike and Forgemaster’s Call, while small volcanoes spout lava chunks around. Volcanic Strike is represented by a big circular telegraph, targeting a tank. Successful cast spawns new volcano at targeted location. Tank has to dodge it ASAP, or it has to be interrupted (3 interrupts are needed). When he starts casting Forgemaster’s Call, fiery orbs will spawn and start moving toward Trogun. He is immobile while casting, so everyone should try and intercept those orbs before they reach him (they don’t deal any damage and every orb increases assault power and support power by some percent). For every orb Trogun collects, his auto attacks deal AoE damage. Ideally, you would set up positions for everyone, something like: one DPS gets orbs behind the boss, one on his left, one on his right and tank gets those in front.
Phase 2
Once you get him to 50%, Trogun runs to his forge and starts casting Exanite Weapon while sending saw blades across the room to your position. It gets easier to dodge saw blades the further you are. The best position is near the entrance closed by an energy wall. You can spot “wriggling channels” between columns of saw blades, and move accordingly to avoid being hit. After Exanite Weapons, it’s like phase 1 again, with volcanoes erupting, Volcanic Strike and Forgemaster’s Call abilities. The only difference is additional mechanic during Forgemaster’s Call, where he starts sending out saw blades during his channeling. Dodging around and gathering fiery orbs can get really tricky. Saw blades deal around 2.5k damage, and it’s better to eat one blade to get an orb. This repeats until Trogun is defeated.
- Ranged DPS can position themselves near the boss and DPS him a bit, if it is possible. Tank has to taunt him after.
- DPS wh… erm, body sellers, will go nuts about collecting as many orbs as they can.
- Either interrupt this and prevent more lava chunks bombarding the area, or just tumble out of it ASAP.
- Exanite Weapon in Phase 2 looks like upgraded 1942 game boss fight.
- Pretty tricky part, DPS should get at least one heal oh their bar, or use medpacks, just to survive in tight situations like this one.
